1、@ApiIgnore 就是将配置中扫描的包下的controller进行排除,这样文档页面就不会进行展示对应的controller了;
2、@Api(value = “注册登陆”,tags = “注册登陆的相关接口”),这个注释添加到要展示的controller类上,以及相关中文注释;
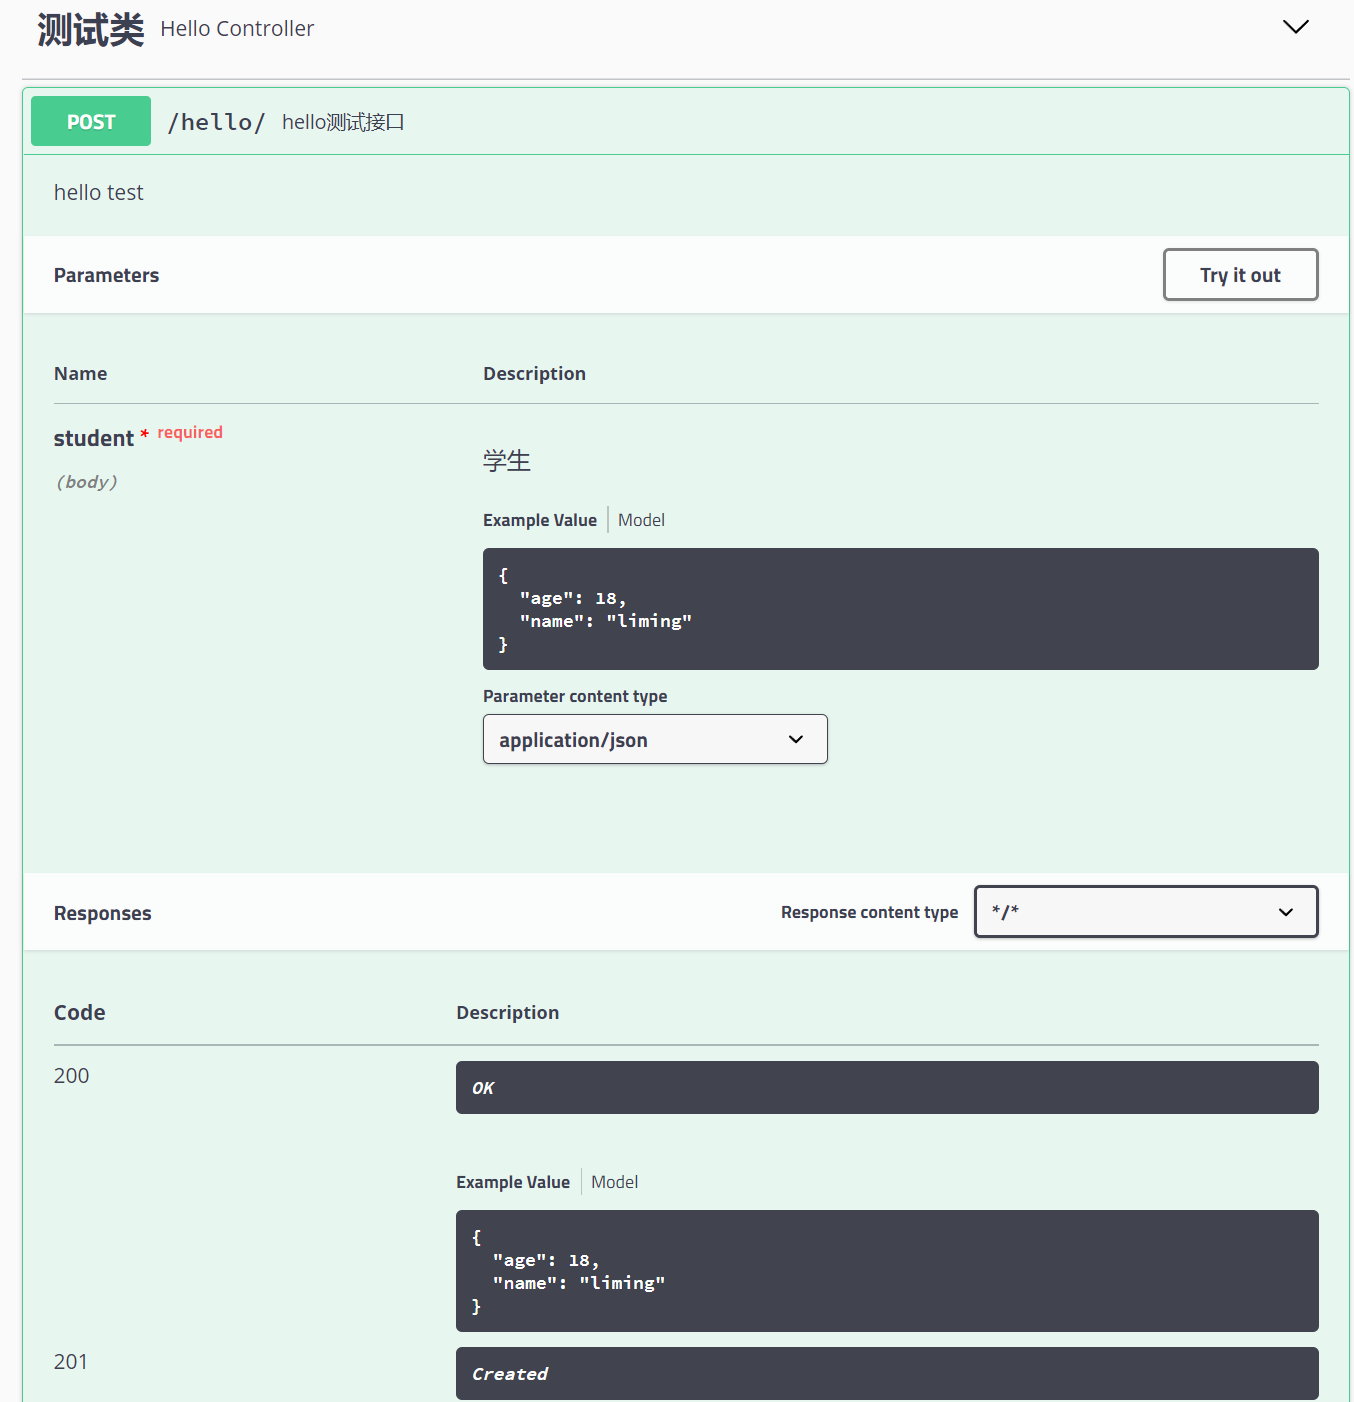
3、@ApiOperation(value = “用户名是否存在”,notes = “用户名是否存在”,httpMethod = “GET”) 主要放置在方法前边,用于展示对应接口的信息,以及请求方式;
4、@ApiModel(value = “用户对象BO”, description = “从客户端,由用户传入的数据封装在此entity中”) 这个主要是放在BO类上(BO类在这个项目就是为了接收参数的封装类)
5、@ApiModelProperty(value = “用户名”,name = “usernmae”,example = “imooc”,required = true) 这个主要是放在BO类中的属性前边,用于描述具体参数信息
HelloController:
@Controller
@Api(tags = "测试类")
@RequestMapping("/hello")
public class HelloController {
    @ApiOperation(value = "hello测试接口",notes = "hello test")

    @ResponseBody
    @PostMapping("/")
    public Student hello(@ApiParam(name = "student",value = "学生",required = true)@RequestBody Student student){
        return student;
    }
}
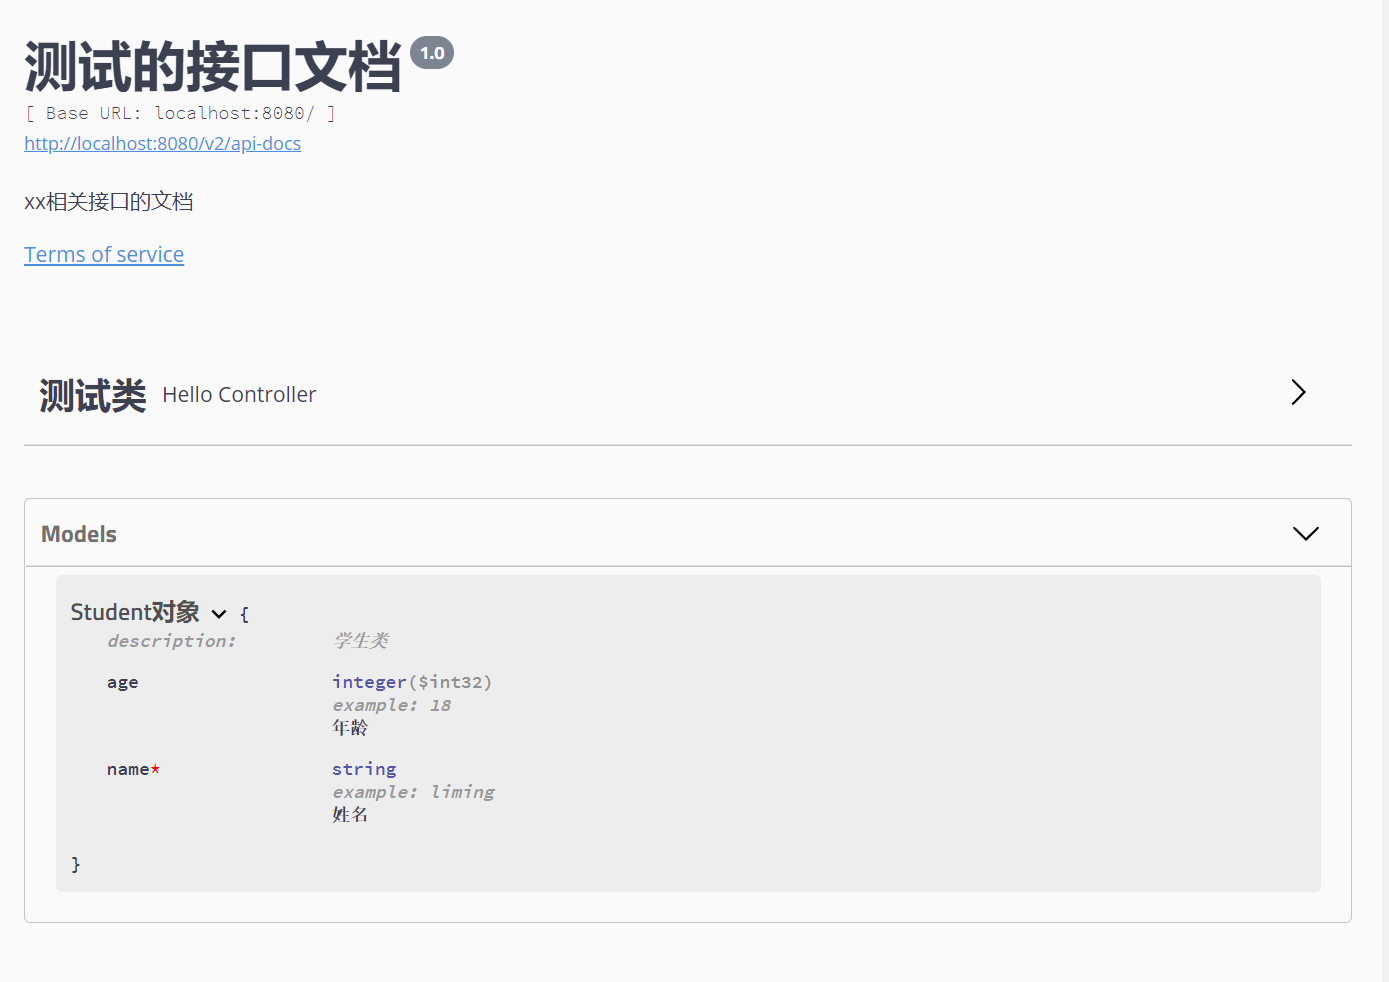
Student:
@ApiModel(value = "Student对象",description = "学生类")
public class Student {
    @ApiModelProperty(value = "姓名",name = "name",example = "liming",required = true)
    public String name;
    @ApiModelProperty(value = "年龄",name = "age",example = "18")
    public Integer age;

    public Student(String name, Integer age) {
        this.name = name;
        this.age = age;
    }

    public String getName() {
        return name;
    }

    public void setName(String name) {
        this.name = name;
    }

    public Integer getAge() {
        return age;
    }

    public void setAge(Integer age) {
        this.age = age;
    }

    @Override
    public String toString() {
        return "Student{" +
                "name='" + name + '\'' +
                ", age=" + age +
                '}';
    }
}
Swagger2Configuration:
/**
 * Swagger使用的配置文件
 */
@Configuration
@EnableSwagger2
public class Swagger2Configuration {
    @Bean
    public Docket createRestApi(){
        return new Docket(DocumentationType.SWAGGER_2)
                .apiInfo(apiInfo())
                .select()
                .apis(RequestHandlerSelectors.withClassAnnotation(Api.class))
                .paths(PathSelectors.any())
                .build();
    }

    //基本信息的配置,信息会在api文档上显示
    private ApiInfo apiInfo(){
        return new ApiInfoBuilder()
                .title("测试的接口文档")
                .description("xx相关接口的文档")
                .termsOfServiceUrl("http://localhost:8080/hello")
                .version("1.0")
                .build();
    }
}
Comments